Installing Pergo flooring can seem daunting, but it doesn’t have to be! With the right tools and a little bit of elbow grease, you can transform your home with beautiful, durable Pergo floors. In this comprehensive guide, we’ll walk you through each step of the installation process, ensuring you achieve professional results without the hefty price tag of hiring a contractor. So, ready to roll up your sleeves and get started?
What is Pergo Flooring?
Pergo is a brand known for its high-quality laminate flooring that mimics the look of hardwood, stone, or tile. It’s renowned for its durability, ease of maintenance, and straightforward installation process. Before diving into the installation, let’s get acquainted with some key features of Pergo flooring:
- Durability: Pergo floors are designed to withstand heavy foot traffic, making them ideal for busy households.
- Aesthetic Appeal: Available in a variety of styles and finishes, Pergo flooring can complement any interior design.
- Ease of Installation: With a click-lock system, installing Pergo flooring is a breeze, even for DIY enthusiasts.
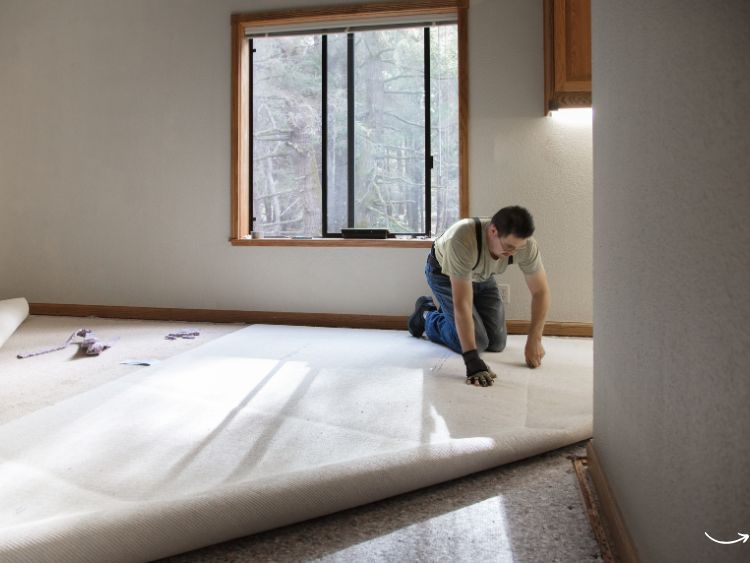
Tools and Materials Needed
Before you begin, gather the following tools and materials:
- Pergo flooring planks
- Underlayment
- Tape measure
- Utility knife
- Spacers
- Rubber mallet
- Pull bar
- Tapping block
- Circular saw or jigsaw
- Safety goggles and gloves
Having everything ready will save you time and ensure a smooth installation process.
Preparing Your Subfloor
Cleaning and Inspecting the Subfloor
First things first, your subfloor needs to be clean, dry, and level. Sweep or vacuum any debris, and check for any uneven areas. If you find any, sand them down or use a leveling compound to create a smooth surface.
Installing the Underlayment
Next, roll out the underlayment, ensuring it covers the entire floor area. The underlayment acts as a moisture barrier and provides sound insulation. Use a utility knife to trim the edges for a perfect fit. Overlap the edges slightly and secure them with tape.
Acclimating Your Pergo Flooring
Before installation, allow your Pergo planks to acclimate to the room’s temperature and humidity for at least 48 hours. This step is crucial as it prevents the flooring from expanding or contracting after installation.
Installing Pergo Flooring
Planning Your Layout
Begin by planning the layout of your flooring. Measure the room and calculate how many planks you’ll need. It’s essential to stagger the seams of the planks to create a more natural look and enhance the floor’s stability.
Installing the First Row
- Start in a Corner: Place spacers along the wall to maintain an expansion gap (usually 1/4 inch) between the flooring and the wall.
- Lay the First Plank: Position the first plank with the tongue side facing the wall. Use the spacers to ensure the plank is straight.
- Continue Along the Wall: Connect the next plank by inserting the tongue into the groove at a slight angle, then lay it flat. Use a tapping block and mallet to secure the connection.
Completing the Installation
- Stagger the Joints: As you continue, ensure the seams of the planks are staggered. This adds visual appeal and strengthens the floor.
- Cutting the Planks: When you reach the end of a row, measure and cut the plank to fit. Use a circular saw or jigsaw for precise cuts.
- Using Pull Bar: For the final rows, you may need a pull bar to fit the planks snugly.
Finishing Touches
- Remove Spacers: Once all the planks are in place, remove the spacers.
- Install Baseboards or Moldings: Cover the expansion gap with baseboards or moldings for a polished look.
Frequently Asked Questions
How Long Does It Take to Install Pergo Flooring?
The installation time depends on the room size and your experience level. Generally, it can take a weekend for a moderately sized room.
Do I Need to Use Underlayment with Pergo Flooring?
Yes, underlayment is essential for moisture protection and sound insulation.
Can I Install Pergo Flooring Over Existing Floors?
Pergo can be installed over most existing floors, including vinyl, tile, and hardwood, as long as the subfloor is level and stable.
How Do I Maintain Pergo Flooring?
Regular sweeping and occasional damp mopping will keep your Pergo floors looking new. Avoid using excessive water or harsh cleaners.
Summary
Installing Pergo flooring is a manageable DIY project that can significantly enhance the look and value of your home. By following this step-by-step guide, you can achieve professional results and enjoy your new flooring for years to come. Remember to gather all necessary tools, prepare your subfloor properly, and take your time during installation. Happy flooring!
Authoritative Links
Here are some authoritative links for more information on Pergo floor installation: